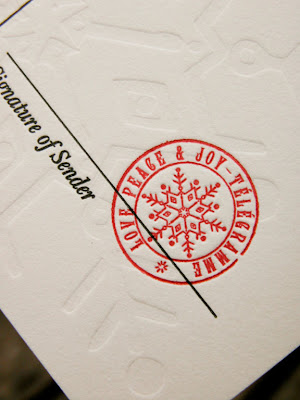
 image source: flickr
Thursday, December 25, 2008
Friday, December 19, 2008
Jurianne Matter


source: Jurianne Matter.
I remember folding paper boats when I was little, but these ones from papier artist extraordinaire—Jurianne Matter are so much more adorable. How about these angel place cards / ornaments?!
Wednesday, December 17, 2008
The Wedding University
 design: chewing the cud
Coming soon to Four Seasons Palo Alto on February 2008.
This is not your usual wedding fair. In fact, it is not a wedding fair at all! It is an all-day seminar of valuable knowledge to educate brides and grooms on planning a successful wedding. Don't miss it... more details coming soon. Stay tuned!
Wednesday, December 10, 2008
Cuddle with Cider Sachets now available
 image source: chewing the cud
Our "Cuddle with Cider" sachets are now available in our shop! Just in time for the holidays.
These sachets contain mulling spices for use with cider and wine.
We recommend using 2 tablespoons of mulling spices per liquid gallon of cider, so with each sachet, you can make about 3 gallons. Steep loose for approximately 45 min, then strain and serve. Easy peasy:) Hot toddy anyone?
Thanks {frolic!}, ritzy bee and black eiffel for the blog love!
Friday, December 05, 2008
Tuesday, December 02, 2008
Gift Presentation III: Glitter without Glare

For the most part, I'm not a big fan of glitter. But used in moderation, it can produce stunning results in gift presentation.
Recently we designed a 50th birthday dinner party. Among other elements we designed were these hostess gifts, wrapped in textured Japanese washi paper and tied with double layers of contrasting ribbons.
We chose a dark-colored paper to let the ribbons stand out. However to keep the presentation interesting, the paper was textured with a herringbone pattern that that we carried through to the gift tag.
 A simple yet chic way to wrap tiny gift boxes (small "sparkling" things do come in small packages...) is to top it off with glittered sculptural accents. Like these butterfly cut-outs easily made from a craft punch.
  all image source: chewing the cud
Wrap your box in plain black gift wrap. Punch out a few butterflies on glitter/silver paper with your craft punch. I added a black butterfly just to make it interesting. Fold butterflies in half and glue spine onto box. Voila!
Gift Presentation II: Kraft Bag + Personalized Tag
 all images: chewing the cud
For gifts that are odd-shaped or better presented in bags, one of our favorite wrapping techniques is the kraft + baker's twine combo. We've included a free template of the sticker tag, in various sizes, used in this tutorial. Download here
Materials:
kraft bag
baker's twine
personalized sticker tag
 Place gift in kraft bag. Fold top over twice and secure underside with double-stick tape.
Wrap baker's twine around the vertical length of the bag several times. Secure with a knot at approximately the top 1/3 of the length. (Shown at location of ribbon). Cut off excess twine.

Download and print tag on adhesive paper. Trim with scissors or circle cutter. Paste tag over the knot.
*All my free downloads are intended for non-commercial use only. Enjoy!*
Monday, December 01, 2008
Gift Presentation I: Draw-It-Yourself Gift Box

all images: chewing the cud
At ctc, we do declare that the art of presentation is in the details! With the holidays rapidly approaching, we thought it would be fun to do a series of posts about gift presentations. Sometimes, the packaging is just as important as the gift!
First up is the DIY gift box... Draw-it-yourself, that is.
Materials:
White box
Sharpie marker, crayon or pen of your choice
Ribbon if desired
 Flatten white box.
 Break out the sharpie and doodle on all sides.
 Finish up with a ribbon of contrasting color, if you so desire.
Subscribe to:
Comments (Atom)


